NPM Bubble list integration
Installation via NPM is an alternative to the standard integration. You must not mix the two methods under any circumstances. This can lead to unpredictable behavior.
Installation
@join-stories/widget-bubble-list package is available through NPM. To add JOIN Web SDK to your project using npm, please use one of the following methods:
npm install @join-stories/widget-bubble-list
pnpm install @join-stories/widget-bubble-list
Widget Bubble
TeamId and widget alias
You will need your team id and the widgets' alias you want to integrate. You can find both of them in the Integration tab of your widget on studio.
To create a widget, check the documentation.
Integration in React
To successfully integrate @join-stories/widget-bubble-list into your webpage, follow these steps:
Step 1: Import renderBubbleList function
renderBubbleList functionimport { renderBubbleList } from "@join-stories/widget-bubble-list";
Step 2: Prepare Container of the widget
You have to create a <div> element that will serve as the container for the widget. Assign a unique id to this <div> to easily reference it later in your JavaScript code.
<div id="unique-div-id" />
Step 3: Initialize renderBubbleList
renderBubbleListuseEffect(() => {
const destroy = renderBubbleList(
"unique-div-id",
"teamId",
"aliasWidget"
);
return () => {
// the destroy method allow you to unmount the widget when the app / page is closed.
destroy();
};
// Only call the useEffect when the whole app is rerendered.
}, []);
Complete overview
Congratulations! By following the steps provided, you've successfully integrated the renderBubbleList widget into your web application. Your code should now look similar to the example below:
import { useEffect } from 'react';
import { renderBubbleList } from "@join-stories/widget-bubble-list";

const App = () => {
	useEffect(() => {
  	const destroy = renderBubbleList(
    	"unique-div-id",
    	"teamId",
    	"aliasWidget"
    );

    return () => {
      destroy();
    };
  }, []);

	return <div id="unique-div-id" />;
}
Integration in HTML & JS
import renderBubbleListfunction and call it when you want to display a widget.
<script type="module" src="./widgetBubble.js"></script>
<div id="unique-div-id">
</div>
import { renderBubbleList } from "@join-stories/widget-bubble-list";
renderBubbleList(
	"unique-div-id",
	"teamId",
	"aliasWidget"
);
Prevent CLS
Content layout shift
When the widget is first displayed, it may cause Content layout shift. To avoid this, you may add custom CSS to reserve space on the page.
Join Stories generate the style automatically for standard widgets. You can get the generated style in the integration panel of your widget on Studio.
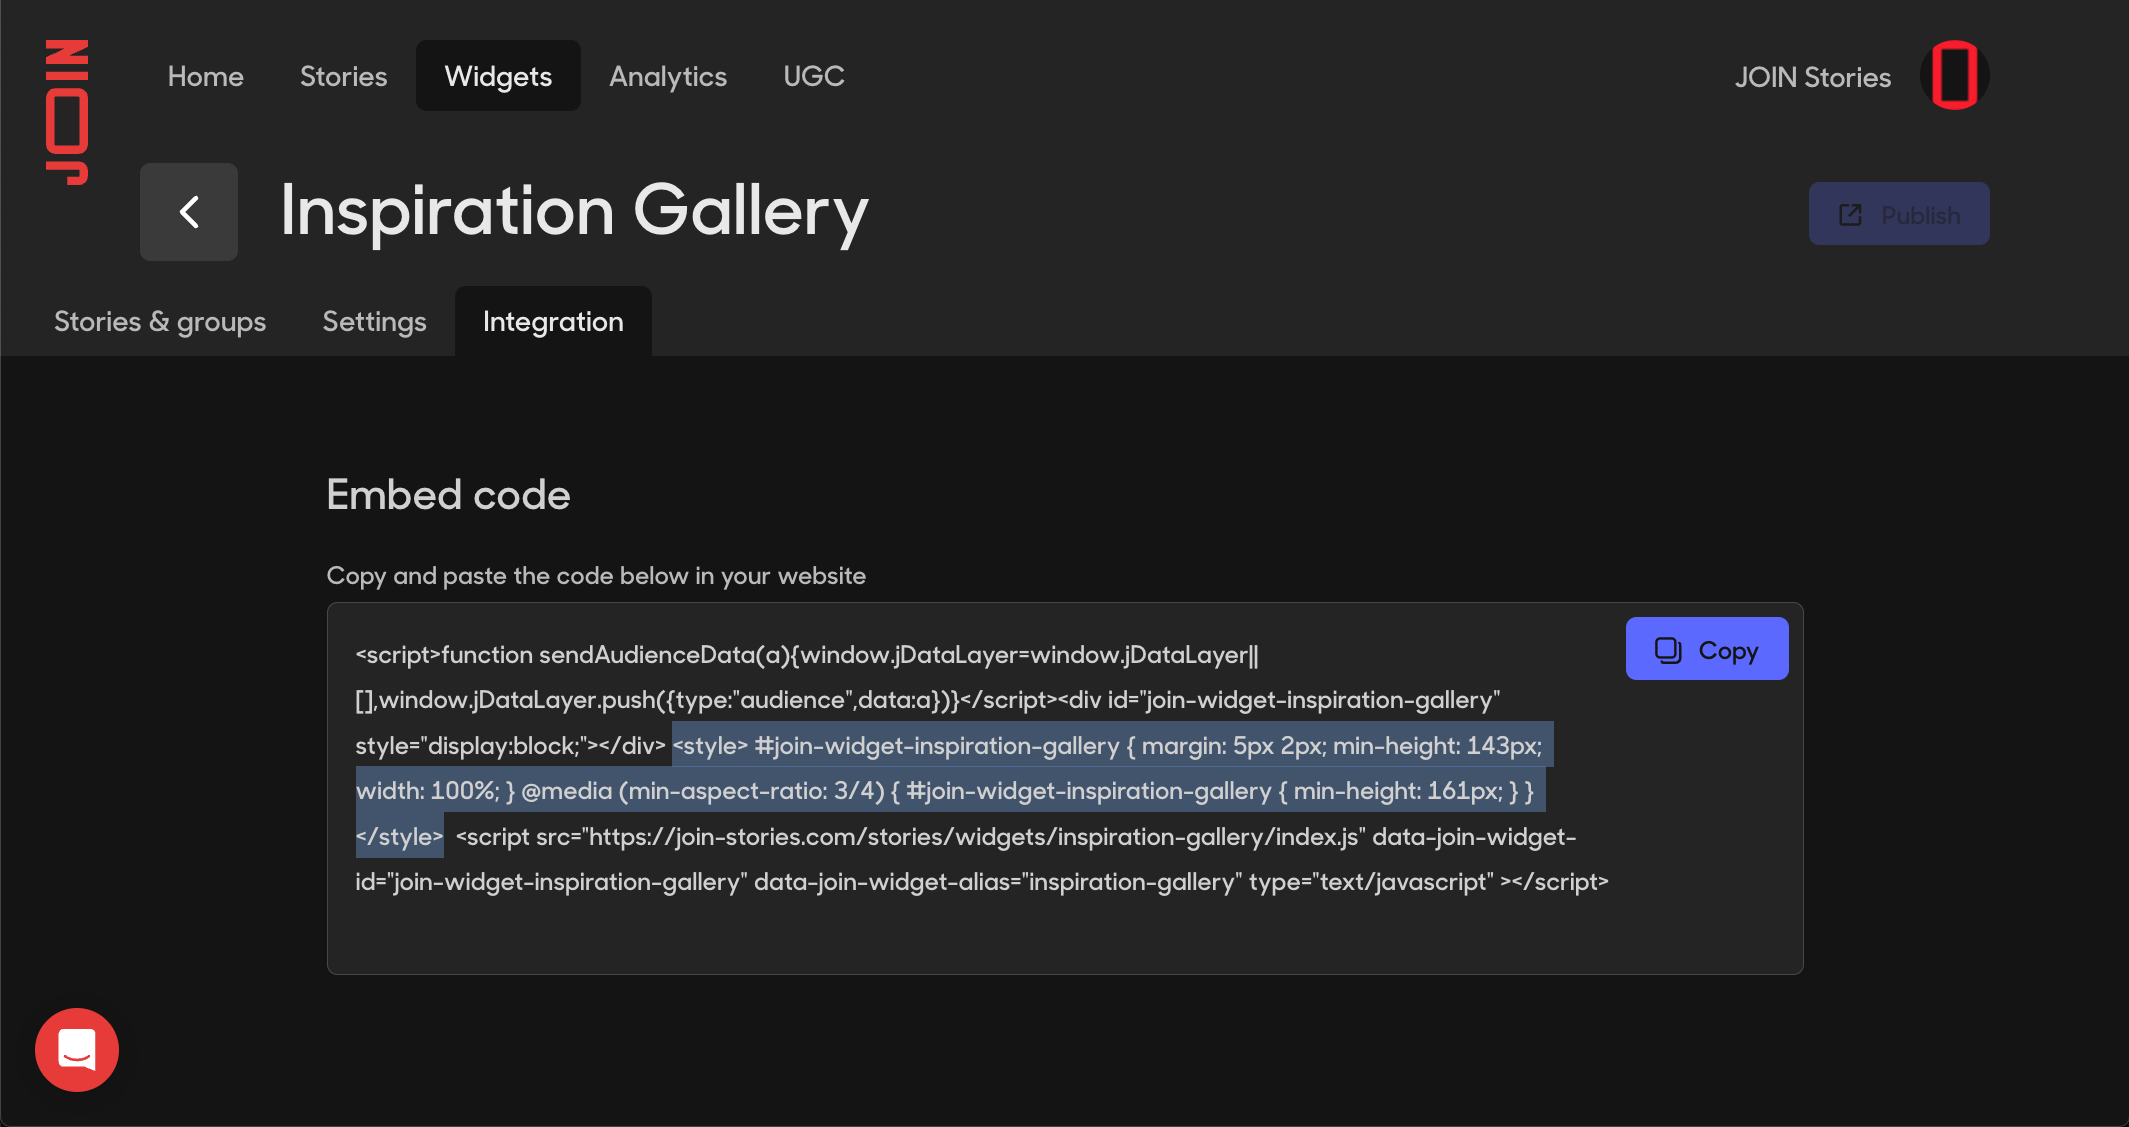
The style depends on the shape and size of your widget. For fully custom integration you may need to adapt these values.
Errors handling
Catch loading errors
renderBubbleListprovides an option, onError, to catch and handle any error happening during the widget loading phase.
renderBubbleList(
	"unique-div-id",
	"teamId",
	"aliasWidget"
    {
        onError(error) {
            console.warn('an error was caught', error);
        }
    }
);
Reference
| Prop | Type | Description | Default | Package version |
|---|---|---|---|---|
| divId | string | HTMLElement | id or element that will contain the widget | - | 1.0.0 |
| teamId | string | id of the team | - | 1.0.0 |
| aliasWidget | string | alias of widget | - | 1.0.0 |
| options | WidgetOptions | an optional options argument to customize widget's behavior. | {} | |
| options.enableAnalytics | boolean | toggle Analytics data collection. | true | 1.0.0 |
| options.analyticsCallbackVersion | v1 | v2 | all | Choose which analytics events to receive in analyticsCallback. 'v1' for old events, 'v2' for new events, 'all' for all events. | v1 | 1.4.0 |
| options.analyticsCallback | (payload: Record<string, any>) => void | an optional callback to listen to widget's Analytics events | - | 1.2.0 |
| options.onError | (error: Error) => void | an optional callback to listen to errors occurring during widget loading step. If provided, errors will be passed to the callback and not thrown. | - | 1.4.0 |
| options.productId | string | product ID to filter stories by. Only works for product page widgets ! | - | 1.7.0 |
Live Examples
To help you better understand how to integrate @join-stories/widget-bubble-list into your projects, we've prepared an example.
Basic integration
Analytics
Analytics callback
You can listen to analytics events triggered by the widget like this:
function analyticsCallback(payload) {
  // Do something with the payload...
  console.log(payload.cpWidgetAlias)
}

renderBubbleList(
  "uniqueDivId",
  "teamId",
  "aliasWidget",
  { analyticsCallback },
);
See Analytics to learn more about available events.
Analytics Version
Since 1.4.0, a new Analytics stack is implemented to allow for a better experience. You can choose which events you receive in analyticsCallback, like this:
function analyticsCallback(payload) {
  // Do something with Analytics v2 payload...
  console.log(payload.widget_alias)
}

renderBubbleList(
  "uniqueDivId",
  "teamId",
  "aliasWidget",
  {
    analyticsCallbackVersion: 'v2',
    analyticsCallback
  },
);
See Reference for more details
Ads
Since 1.3.0, If you have setup JOIN Ads, you set custom targeting using the method setCustomAdsTargeting like this:
import { setCustomAdsTargeting } from "@join-stories/widget-bubble-list";

setCustomAdsTargeting({
  program_id: "1234",
}, 'my-widget-alias');
For more details on Ads, see Ads.
For more details on custom targeting, see Set custom targeting.